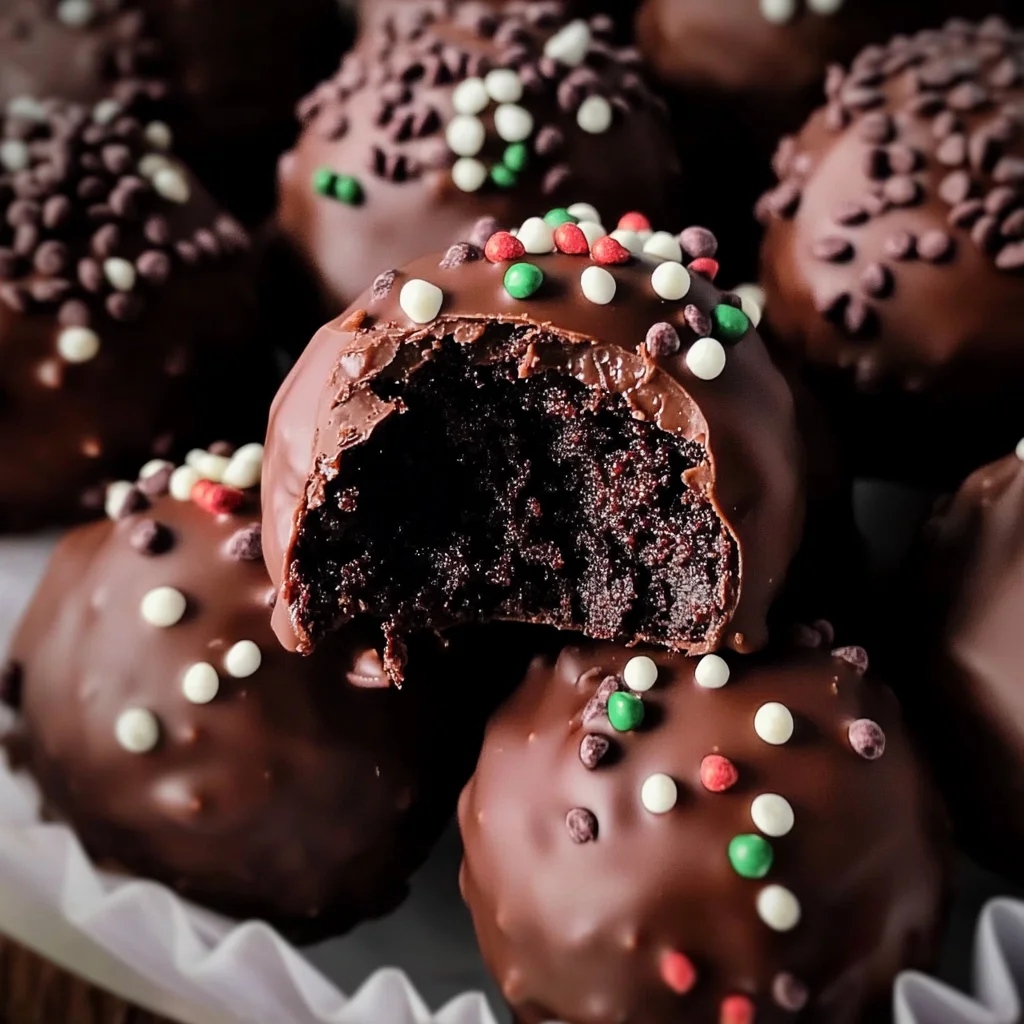
Double Chocolate Brownie Truffles (3 ways!) are a delightful treat that combines rich chocolate flavor with customizable decorations. Perfect for any occasion, from festive holidays to birthdays, these truffles are not only delicious but can also be made gluten-free. Enjoy the versatility and fun of creating your own unique truffles!
Why You’ll Love This Recipe
- Easy to Make: These truffles require simple ingredients and straightforward steps, making them perfect for bakers of all levels.
- Customizable: With various decoration options, you can tailor the truffles for any event or holiday theme.
- Rich Flavor: The deep chocolate taste comes from high-quality ingredients, ensuring a decadent treat in every bite.
- Gluten-Free Option: Using oat flour makes it easy to create a gluten-free version without compromising on taste or texture.
- Perfect Gift Idea: Packaged beautifully, these truffles make an excellent gift for friends and family.
Tools and Preparation
To make Double Chocolate Brownie Truffles (3 ways!), you’ll need some essential tools to ensure your baking process goes smoothly.
Essential Tools and Equipment
- Mixing bowls
- Measuring cups and spoons
- Whisk or electric mixer
- Baking sheet
- Parchment paper
Importance of Each Tool
- Mixing bowls: Essential for combining ingredients thoroughly, preventing clumps in your batter.
- Measuring cups and spoons: Accurate measurement ensures the right balance of flavors and textures in your truffles.
- Whisk or electric mixer: Helps achieve a smooth batter by properly aerating the mixture, leading to lighter truffles.
- Baking sheet: Provides a stable surface for cooling the truffles after they are formed.

Ingredients
To create these delicious Double Chocolate Brownie Truffles (3 ways!), gather the following ingredients:
For the Brownie Base
- 1/2 cup (1 stick) Nellie’s Free Range Unsalted Butter
- 1 cup dark chocolate chips
- 3/4 cup sugar
- 1/2 teaspoon salt
- 2 teaspoons vanilla extract
- 2 large Nellie’s Free Range Eggs
- 1/2 cup all-purpose or whole grain oat flour
For Coating and Decorating
- 1 1/2 cups chocolate chips, chopped chocolate, or candy melts
- Holiday: white and silver nonpareil sprinkles; crushed candy cane pieces
- Halloween: candy eyes and/or chocolate sprinkles
- Classic: multi chocolate drizzle, white chocolate, milk chocolate, dark chocolate, and/or colored candy melts
- Flavored: chopped nuts, cocoa nibs, sea salt
- Traditional: cocoa powder
How to Make Double Chocolate Brownie Truffles (3 ways!)
Step 1: Preheat Your Oven
Preheat your oven to 350°F (175°C). This ensures that the brownie base bakes evenly.
Step 2: Prepare Your Baking Sheet
Line a baking sheet with parchment paper. This helps prevent sticking and makes cleanup easier.
Step 3: Melt the Butter and Chocolate
In a medium saucepan over low heat:
1. Combine the Nellie’s Free Range Unsalted Butter and dark chocolate chips.
2. Stir until completely melted and smooth. Remove from heat.
Step 4: Mix Sugar and Eggs
In a large mixing bowl:
1. Add the melted butter-chocolate mixture.
2. Stir in the sugar, salt, vanilla extract, and Nellie’s Free Range Eggs. Mix until well combined.
Step 5: Incorporate Flour
Gradually add in the oat flour, mixing until just combined. Avoid overmixing to keep your truffle base light.
Step 6: Bake the Brownies
Pour the brownie mixture onto your prepared baking sheet:
1. Spread it evenly with a spatula.
2. Bake for 25–30 minutes or until a toothpick inserted comes out clean.
Step 7: Cool and Form Truffles
Once baked:
1. Allow brownies to cool completely on the baking sheet.
2. Once cooled, crumble into small pieces in a bowl.
3. Roll into 1-inch balls with your hands.
Step 8: Coat Your Truffles
Melt your chosen coating (chocolate chips or candy melts) in a microwave-safe bowl:
1. Dip each brownie ball into the melted coating.
2. Place coated truffles back onto parchment paper to set.
Step 9: Decorate as Desired
Before coating sets:
1. Sprinkle with your choice of decorations (holiday sprinkles, nuts).
2. Allow coating to harden completely before serving.
Enjoy your homemade Double Chocolate Brownie Truffles (3 ways!) as a sweet treat for yourself or share with family and friends!
How to Serve Double Chocolate Brownie Truffles (3 ways!)
These delightful Double Chocolate Brownie Truffles can be served in various ways to suit any occasion. Whether you’re celebrating a holiday, hosting a party, or enjoying a quiet evening at home, these truffles can be dressed up or down to impress your guests.
Holiday Serving
- Festive Sprinkles: Top your truffles with white and silver nonpareil sprinkles or crushed candy cane pieces to add a seasonal touch.
- Chocolate Drizzle: Drizzle melted chocolate over the truffles for an elegant look that enhances the chocolate flavor.
Halloween Serving
- Candy Eyes: Add playful candy eyes for a spooky vibe perfect for Halloween gatherings.
- Chocolate Sprinkles: Coat the truffles in chocolate sprinkles to make them look extra tempting and festive.
Classic Serving
- Multi-Chocolate Drizzle: Use a mix of white, milk, and dark chocolate for drizzling to create a visually appealing treat.
- Chopped Nuts: Sprinkle some chopped nuts on top for added texture and flavor contrast.
How to Perfect Double Chocolate Brownie Truffles (3 ways!)
Perfecting your Double Chocolate Brownie Truffles is all about technique and attention to detail. With these tips, you can ensure they turn out delicious every time.
- Bold Butter Choice: Use high-quality unsalted butter for richer flavor and better texture.
- Bold Temperature Check: Allow your chocolate to cool slightly before mixing it with eggs; this prevents scrambling.
- Bold Mixing Method: Stir ingredients gently but thoroughly; over-mixing may lead to dense truffles rather than light ones.
- Bold Chilling Time: Chill the mixture adequately before rolling into balls; this helps maintain their shape during coating.
Best Side Dishes for Double Chocolate Brownie Truffles (3 ways!)
Pairing side dishes with your Double Chocolate Brownie Truffles can elevate your dessert experience. Here are some delightful options:
- Fresh Berries: Serve with strawberries or raspberries for a refreshing contrast to the rich chocolate flavors.
- Vanilla Ice Cream: A scoop of creamy vanilla ice cream complements the fudgy truffles perfectly.
- Whipped Cream: Light whipped cream adds a fluffy texture that balances the density of the truffles.
- Chocolate Sauce: Drizzle warm chocolate sauce on the plate for an indulgent touch that enhances each bite.
- Fruit Compote: A tangy fruit compote adds brightness and pairs well with chocolate’s richness.
- Coffee or Espresso: A cup of coffee or espresso rounds out the meal beautifully and enhances the chocolate taste.
Common Mistakes to Avoid
Making Double Chocolate Brownie Truffles can be a fun and rewarding experience, but there are common pitfalls to watch out for.
- Skipping the butter softening step – Using cold butter can lead to lumpy truffles. Always allow your butter to soften at room temperature before mixing.
- Overbaking the brownies – Brownies should be fudgy, not dry. Keep an eye on them and test with a toothpick; it should come out with a few moist crumbs.
- Not letting the mixture cool – If you don’t let the brownie mixture cool before adding eggs, they may cook. Let it cool slightly before mixing in the eggs.
- Ignoring ingredient measurements – Baking is a science, so be precise with your ingredient measurements to ensure perfect texture and taste.
- Forgetting about decoration options – Customize your truffles! Don’t miss the chance to add fun toppings that can enhance both flavor and presentation.
Storage & Reheating Instructions
Refrigerator Storage
- Store truffles in an airtight container.
- They will last up to 5 days in the refrigerator.
Freezing Double Chocolate Brownie Truffles (3 ways!)
- Freeze in a single layer on a baking sheet for about 2 hours.
- Once set, transfer them to an airtight container or freezer bag. They can be frozen for up to 3 months.
Reheating Double Chocolate Brownie Truffles (3 ways!)
- Oven – Preheat to 350°F (175°C) and warm for 5-10 minutes until just heated through.
- Microwave – Heat individually on medium power for 10-15 seconds. Be cautious not to overheat.
- Stovetop – Use a non-stick pan on low heat for about 1-2 minutes, flipping gently.
Frequently Asked Questions
Here are some frequently asked questions about making Double Chocolate Brownie Truffles.
Can I make Double Chocolate Brownie Truffles gluten-free?
Yes! Simply substitute all-purpose flour with gluten-free oat flour or another suitable gluten-free flour blend.
What can I use instead of chocolate chips?
You can use chopped chocolate or candy melts as alternatives. Both options will give you that rich chocolate flavor.
How do I customize my Double Chocolate Brownie Truffles?
Get creative! You can add various toppings like sprinkles, crushed nuts, or flavored drizzles for unique twists.
Can I use different types of chocolate?
Absolutely! Feel free to mix semi-sweet, dark, or even white chocolate according to your preference.
Final Thoughts
Double Chocolate Brownie Truffles are delightful treats that offer rich chocolatey goodness in every bite. Their versatility allows you to customize them for any occasion with festive decorations or unique flavors. Whether you’re celebrating a holiday or just indulging yourself, these truffles are sure to impress!

Double Chocolate Brownie Truffles (3 ways!)
- Total Time: 45 minutes
- Yield: Approximately 24 servings 1x
Description
Indulge in the delightful world of Double Chocolate Brownie Truffles (3 ways!), a rich and decadent treat that’s perfect for any occasion. These truffles combine the luxurious taste of deep chocolate with customizable decorations, making them ideal for festive celebrations, parties, or simply as a sweet indulgence at home. With an easy-to-follow recipe, you can create these no-bake brownie bites using simple ingredients, ensuring every bite is a mouthwatering experience. Plus, they can be made gluten-free, so everyone can enjoy this chocolatey goodness. Transform your dessert table with these versatile truffles and impress your family and friends!
Ingredients
- 1/2 cup unsalted butter
- 1 cup dark chocolate chips
- 3/4 cup sugar
- 1/2 teaspoon salt
- 2 teaspoons vanilla extract
- 2 large eggs
- 1/2 cup oat flour
- 1 1/2 cups chocolate chips or candy melts
Instructions
- Preheat your oven to 350°F (175°C) and line a baking sheet with parchment paper.
- Melt the butter and dark chocolate together in a saucepan over low heat until smooth.
- In a bowl, combine the melted mixture with sugar, salt, vanilla extract, and eggs; mix well.
- Gradually add oat flour and stir until just combined.
- Pour the batter onto the prepared baking sheet and spread evenly. Bake for 25–30 minutes until a toothpick comes out clean.
- Cool completely, then crumble the brownies into small pieces and roll into 1-inch balls.
- Melt your chosen coating in a microwave-safe bowl and dip each ball into it.
- Place coated truffles back on parchment paper to set and decorate as desired.
- Prep Time: 15 minutes
- Cook Time: 30 minutes
- Category: Dessert
- Method: Baking
- Cuisine: American
Nutrition
- Serving Size: 1 serving
- Calories: 115
- Sugar: 10g
- Sodium: 45mg
- Fat: 7g
- Saturated Fat: 4g
- Unsaturated Fat: 2g
- Trans Fat: 0g
- Carbohydrates: 11g
- Fiber: 1g
- Protein: 1g
- Cholesterol: 20mg
Keywords: Experiment with various toppings such as crushed nuts or sprinkles to elevate your truffles’ appearance and flavor. For added texture, try incorporating cocoa nibs or sea salt into your coating options.