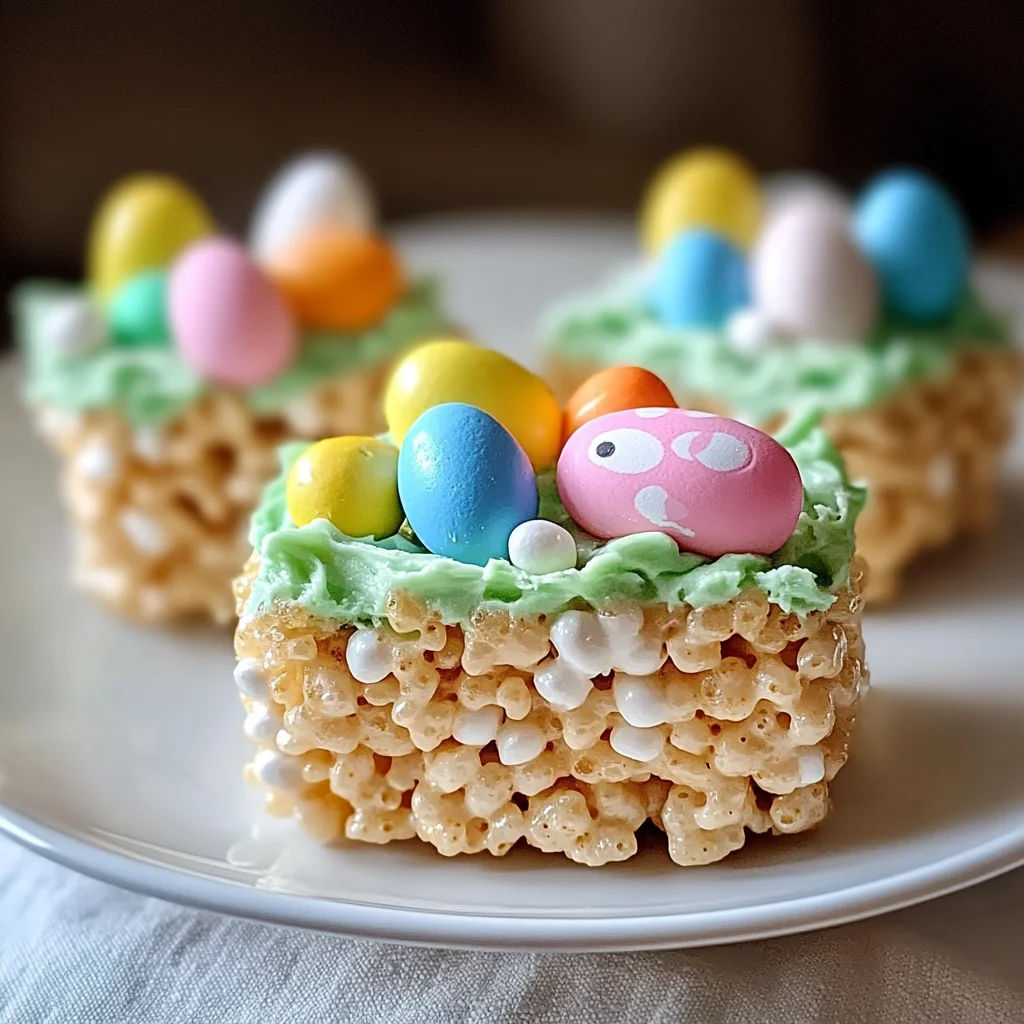
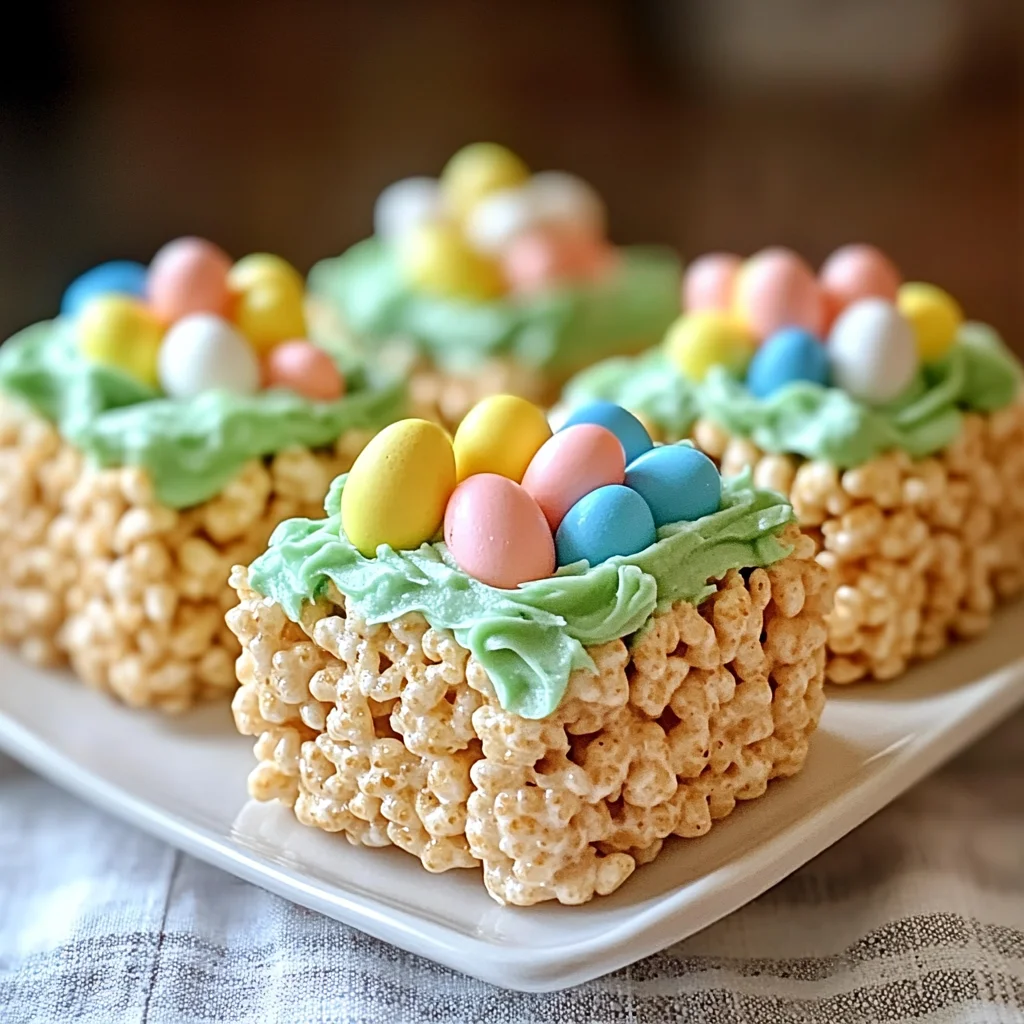
Krispies Easter Egg Nests are a delightful treat that captures the joy of spring celebrations. These charming nests, made with crispy rice cereal, colorful frosting, and festive candy eggs, are perfect for Easter gatherings and other springtime events. Their unique presentation and delicious flavor make them a favorite among both kids and adults. Easy to prepare and fun to decorate, these nests are sure to bring smiles to any occasion.
Why You’ll Love This Recipe
- Quick Preparation: This recipe takes only 12 minutes from start to finish, making it a great last-minute treat.
- Kid-Friendly Fun: Kids will love helping to create these nests, making it a fun family activity.
- Versatile Decoration: You can customize the nests with different candies or colors for various occasions.
- Perfect for Sharing: With 30 servings, these treats are ideal for parties or potlucks.
- Deliciously Sweet: The combination of marshmallows and frosting creates an irresistible flavor that everyone will enjoy.
Tools and Preparation
Before starting your Krispies Easter Egg Nests, gather the necessary tools. Having everything ready will make the process smoother.
Essential Tools and Equipment
- Standard cupcake pans
- Microwave-safe bowl
- Buttered spatula
- Mixer
- Piping bag with grass tip
Importance of Each Tool
- Standard cupcake pans: Essential for shaping your nests perfectly; they help achieve that charming hollow center.
- Mixer: Makes creaming the butter and sugar quick and easy for smooth frosting.
- Piping bag with grass tip: Allows you to create beautiful, textured frosting that resembles grass for your nests.
Ingredients
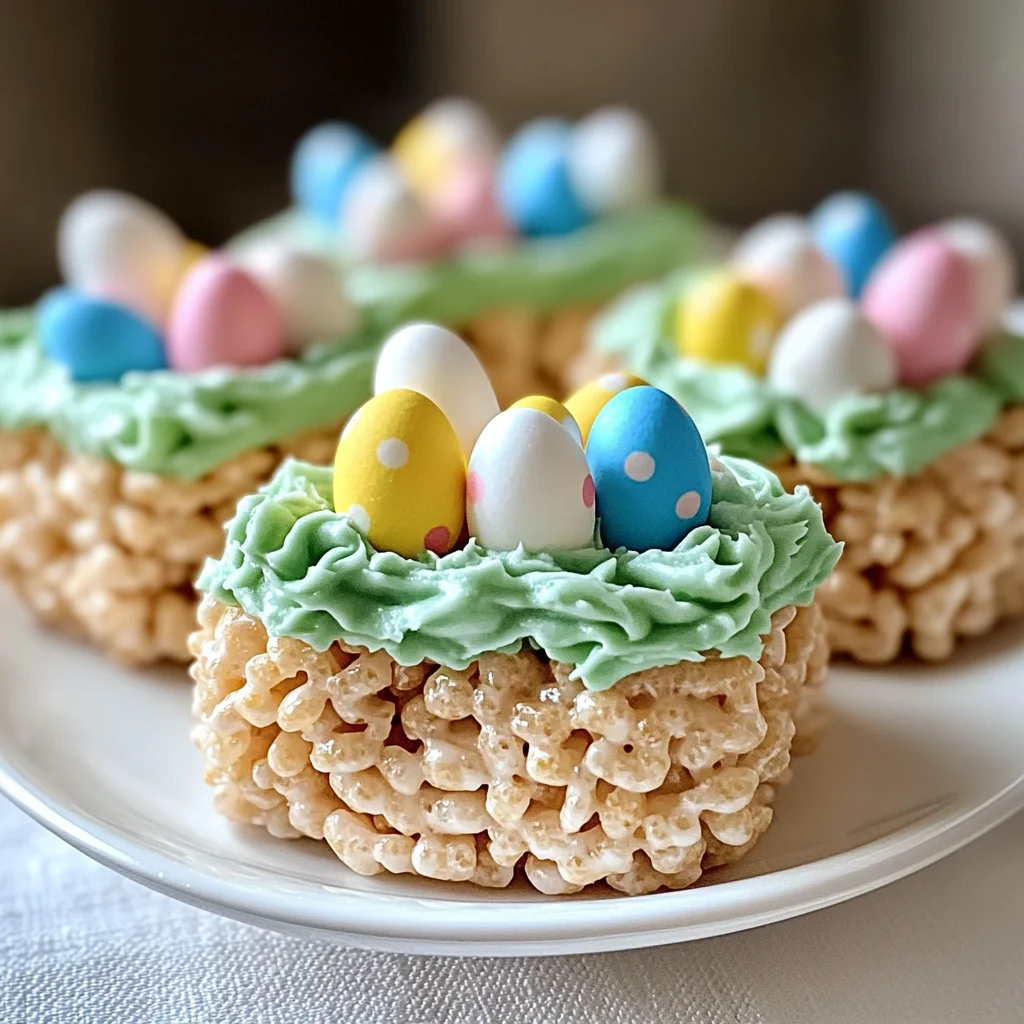
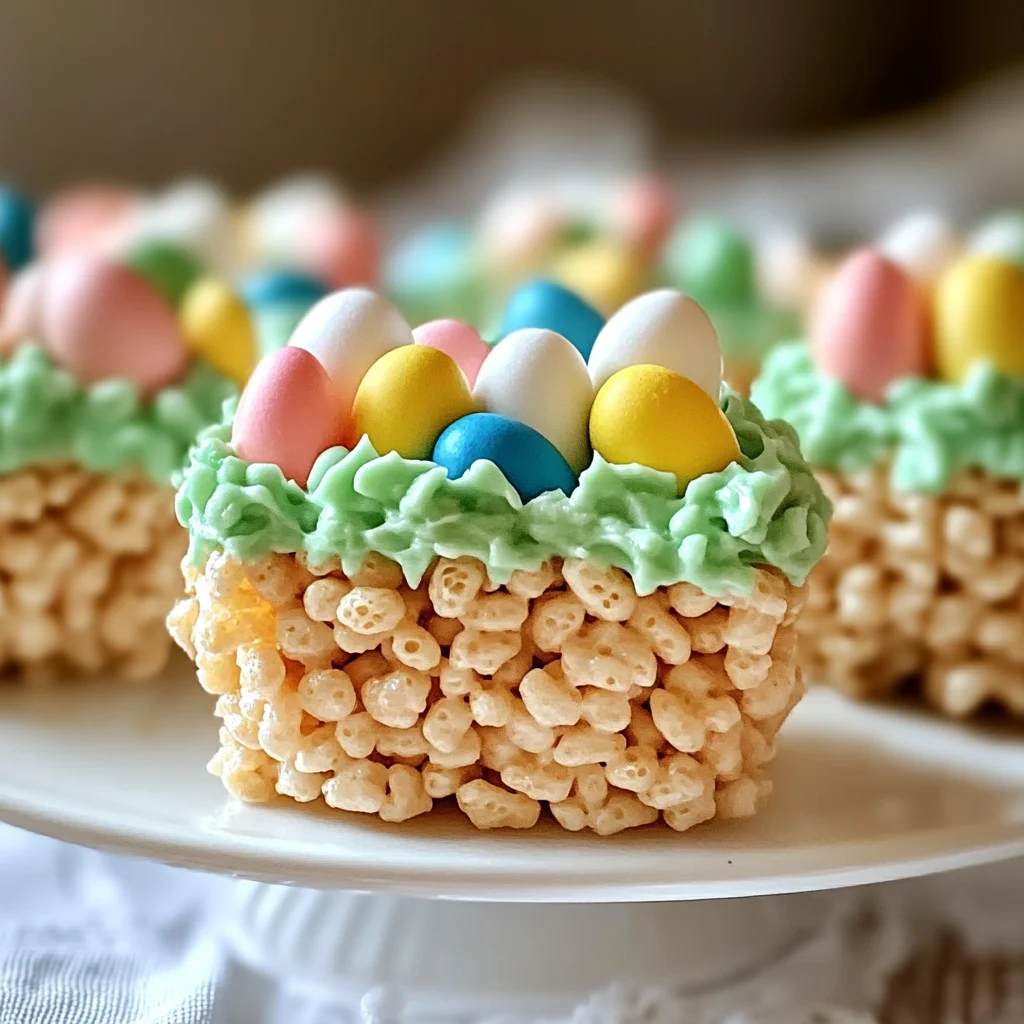
Festive Krispies nests with frosting and candy eggs. A charming dessert for spring gatherings.
- 16 ounces marshmallows, jumbo or mini
- 7 cups Rice Krispies
- 2 tablespoons unsalted butter
- Easter egg candies
- ½ cup unsalted butter
- 3-4 cups powdered sugar
- ¼ cup milk
- 1 teaspoon vanilla extract
- Green food coloring
How to Make Krispies Easter Egg Nests
Step 1: Prepare the Cupcake Pans
Thoroughly grease standard cupcake pans using cooking spray or butter. Pay special attention to the corners where the treats tend to stick.
Step 2: Melt Marshmallows
Combine the marshmallows and 2 tablespoons unsalted butter in a microwave-safe bowl. Microwave in 30-second intervals, stirring in between, until smooth and fully melted.
Step 3: Mix with Rice Krispies
Quickly stir the melted marshmallow mixture into the Rice Krispies. Use a buttered spatula to ensure even coverage of all cereal.
Step 4: Shape the Nests
Spoon the mixture into the greased cupcake pan cavities, pressing gently into the center of each to create a hollow nest shape. Use wax paper or greased hands to avoid sticking.
Step 5: Let Them Set
Let the formed nests rest at room temperature for about 30 minutes until firm.
Step 6: Make the Frosting
In a large mixing bowl, use a mixer to cream ½ cup butter until smooth. Gradually add 2 cups powdered sugar, ¼ cup milk, and 1 teaspoon vanilla extract. Beat for 5 minutes until creamy. Add the remaining powdered sugar and green food coloring until the desired shade and thickness is achieved.
Step 7: Decorate Your Nests
Transfer frosting to a piping bag fitted with a grass tip. Pipe frosting onto the centers of the cooled nests, starting from the outer edge and moving inward. Top with 2-3 Easter egg candies.
How to Serve Krispies Easter Egg Nests
Krispies Easter Egg Nests are a delightful treat that brings joy to any spring gathering. They can be served in various ways to enhance their appeal and make them even more festive.
Individual Treats
- Serve each nest on a small plate for an elegant look at your dessert table.
- Place them in colorful cupcake liners for an extra pop of color.
Dessert Buffet
- Arrange the nests on a tiered stand for an eye-catching display.
- Include a variety of Easter-themed treats alongside them for a complete dessert experience.
Gift Boxes
- Package several nests in clear boxes tied with pastel ribbons as charming party favors.
- Personalize the boxes with tags for guests to take home.
Themed Parties
- Use these nests as part of an Easter brunch spread, complementing other holiday dishes.
- Pair them with themed decorations like bunny figurines or floral arrangements for a festive atmosphere.
How to Perfect Krispies Easter Egg Nests
To make your Krispies Easter Egg Nests truly stand out, consider these simple tips.
- Use fresh ingredients: Fresh marshmallows and butter ensure the best flavor and texture.
- Grease well: Properly greasing the cupcake pan prevents sticking and makes removal easier.
- Don’t rush cooling: Allowing the nests to cool completely helps maintain their shape and firmness.
- Colorful frosting: Experiment with different shades of green for the frosting to create visually appealing nests.
- Add variety: Mix in different types of candies or chocolates to customize each nest according to taste preferences.
Best Side Dishes for Krispies Easter Egg Nests
Pair your delightful Krispies Easter Egg Nests with these tasty side dishes that complement their sweetness while adding variety to your spread.
- Fresh Fruit Salad: A mix of seasonal fruits adds freshness and balances the sweetness of the nests.
- Deviled Eggs: Classic deviled eggs provide a savory option that contrasts nicely with your sweet treats.
- Vegetable Platter: Crunchy veggies paired with dip offer a healthy contrast and vibrant colors on the table.
- Mini Sandwiches: Bite-sized sandwiches filled with various spreads cater to savory cravings at your gathering.
- Cheese Board: A selection of cheeses, crackers, and nuts creates an elegant touch alongside desserts.
- Spring Pea Salad: Bright green peas tossed with mint and feta add a refreshing element that’s perfect for spring.
Common Mistakes to Avoid
When making Krispies Easter Egg Nests, even seasoned bakers can run into challenges. Here are some common mistakes and how to avoid them.
-
Not Greasing the Pan Properly: Failing to grease the cupcake pans can lead to nests sticking. Always use cooking spray or butter generously, especially in the corners.
-
Overcooking the Marshmallows: Microwaving marshmallows too long can make them tough. Heat in short 30-second intervals and stir frequently until just melted.
-
Not Pressing Firmly Enough: If you don’t press the mixture into the pan firmly, nests may crumble. Use a buttered spatula or wax paper to compact it well.
-
Skipping Cooling Time: Rushing to remove the nests can cause them to fall apart. Allow at least 30 minutes for them to set at room temperature before taking them out.
-
Incorrect Frosting Consistency: If your frosting is too runny or thick, it won’t pipe well. Adjust with powdered sugar or milk until you reach a creamy consistency that holds its shape.
Storage & Reheating Instructions
Refrigerator Storage
- Store in an airtight container.
- Keep in the fridge for up to one week for best freshness.
Freezing Krispies Easter Egg Nests
- Wrap each nest individually in plastic wrap.
- Place in a freezer-safe bag or container; they can be frozen for up to three months.
Reheating Krispies Easter Egg Nests
- Oven: Preheat oven to 300°F (150°C). Place nests on a baking sheet and heat for about 5-10 minutes until warm.
- Microwave: Heat on low power for 10-15 seconds at a time until just warm; be careful not to overheat.
- Stovetop: Place nests in a covered skillet over low heat for a few minutes, checking frequently to avoid burning.
Frequently Asked Questions
Here are answers to some common questions about making Krispies Easter Egg Nests.
What are Krispies Easter Egg Nests?
Krispies Easter Egg Nests are festive treats made from Rice Krispies cereal mixed with melted marshmallows, shaped into nests, and decorated with frosting and candy eggs.
How do I customize my Krispies Easter Egg Nests?
You can customize your nests by adding different candies, using chocolate-covered eggs, or even incorporating nuts or dried fruits into the mixture.
Can I make these nests ahead of time?
Yes! You can make Krispies Easter Egg Nests a day or two ahead of your event. Just store them properly in an airtight container.
What if I don’t have a cupcake pan?
If you don’t have a cupcake pan, you can shape the nests by hand on parchment paper. Just form small mounds and create a hollow center using your fingers.
Final Thoughts
Krispies Easter Egg Nests are delightful treats that not only taste great but also add charm to any spring gathering. These cute desserts are versatile; feel free to customize them with your favorite candies or colors. Try making these sweet creations for your next celebration!
Krispies Easter Egg Nests
- Total Time: 10 minute
- Yield: Approximately 30 servings 1x
Description
Krispies Easter Egg Nests are an enchanting treat that perfectly embodies the spirit of spring celebrations. These delightful nests are crafted from crunchy Rice Krispies cereal, combined with melted marshmallows and adorned with vibrant frosting and colorful candy eggs. Not only are they visually appealing, but they also offer a sweet and chewy flavor that appeals to both children and adults alike. With just a quick preparation time of 12 minutes, these charming treats make an ideal addition to any Easter gathering or springtime event. Kids will enjoy participating in the decorating process, making these nests not just a dessert but a memorable family activity. Whether served individually or as part of a festive dessert spread, Krispies Easter Egg Nests are sure to bring joy and smiles to your celebration.
Ingredients
- 16 ounces marshmallows (jumbo or mini)
- 7 cups Rice Krispies
- 2 tablespoons unsalted butter (for mixture)
- ½ cup unsalted butter (for frosting)
- Easter egg candies
- 3–4 cups powdered sugar
- ¼ cup milk
- 1 teaspoon vanilla extract
- Green food coloring
Instructions
- Grease standard cupcake pans thoroughly with cooking spray or butter.
- In a microwave-safe bowl, combine marshmallows and 2 tablespoons of butter. Microwave in 30-second increments until melted and smooth.
- Stir the melted marshmallow mixture into the Rice Krispies using a buttered spatula for even coverage.
- Spoon the mixture into the greased cupcake pan cavities, pressing gently to form hollow nests.
- Let the nests set at room temperature for about 30 minutes.
- For frosting, cream together the remaining butter and gradually add powdered sugar, milk, and vanilla extract until smooth. Add green food coloring to achieve desired color.
- Pipe frosting onto cooled nests and top with candy eggs.
- Prep Time: 12 minutes
- Cook Time: None
- Category: Dessert
- Method: No-bake
- Cuisine: American
Nutrition
- Serving Size: 1 serving
- Calories: 150
- Sugar: 14g
- Sodium: 60mg
- Fat: 5g
- Saturated Fat: 3g
- Unsaturated Fat: 2g
- Trans Fat: 0g
- Carbohydrates: 24g
- Fiber: 0g
- Protein: 1g
- Cholesterol: 10mg
Keywords: Experiment with different candies for unique decorations. Allow nests to cool completely for better shape retention. Store extras in an airtight container for up to one week.